How to Sell Products on Amazon
Selling on Amazon.com is easy. First you register to sell on Amazon and list the products that you want to sell on Amazon.com marketplace. Customer sees your product and makes a purchase. You will receive a notification to ship the product. You deliver the product to the customer and confirm shipment or let Amazon fulfill the order for you through FBA or Easy ship. Amazon will deposit the funds into your bank account after deducting our free.
Step1:
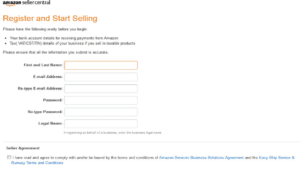
First you need to register to sell on Amazon. You will need the following information to register.
- Your company details
- Your contact details – email and phone number
- Basic information about your business
- GST Details are mandatory and need to be provided after registration
- Bank A/c details
- UPC, EAN, ISBN or ASIN or Brand Registry Document
Please Note:
GST are required to sell online in. You need to provide GST number to Amazon at the time of registration. However, if you are selling only GST exempted categories, then this may not be required. Note that if you start selling any taxable goods you need to register for GST as per sales tax law and provide GST to Amazon.
Step: 02
After Successfully seller registration you need to add your products on amazon store. You can use Web-based interface to list products one at a time, or excel-based inventory files to list your products in bulk. The procedure and information required will vary depending on whether your products are already in the Amazon.com catalogue.
Basically two type of Method for adding products on amazon:
Manual Products Listing
Bulk Products Listing
Manual Products listing
using manual products listing method you can list only one products at a time by using amazon Web-based interface. The procedure and information required will vary of your products type.
Step to listing products on amazon by manual method:
Step 1:
You need to login amazon.com seller panel to access web-based interface to listing
Step 2:
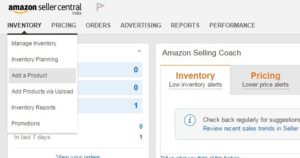
After successfully login amazon seller panel you can go to Inventory menu and Click on “Add a Product” sub-menu.
After Click on the “Add a Product” sub-menu you can show it.
Step 3:
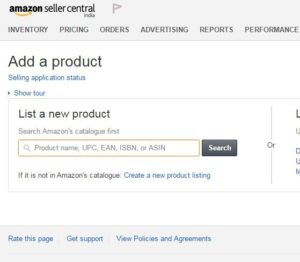
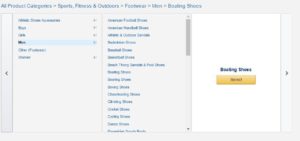
Now you search your products by using product name, UPC, EAN, ISBN or ASIN. If it not in Amazon’s catalogue then Click on the “Create a new products listing. After Click on the “Create a new products listing”. You need to classify your new products. For classify the products you need to select the proper category for your products. Example: Super Sport Outdoor Men Boating Shoe.
All Product Categories > Sports, Fitness & Outdoors >Footwear > Men > Boating Shoes
Step 4:
After selection of categories you need to add information of products. Now you need to fill the products information by selecting the “Vital Info”, Variations, and offer, Images, Description, Keyword and More Details.
Vital info: In the “vital info” Tab you need to file the basic products details. Like Products “Item Name”, “Brand Name”, Manufacture Part No, Item type, Size and color etc.
Variations: In the “Variations Tab “you need to fill the information of attributes for variations of products. Example in different colors and sizes. Like Shoes: Color: Black, Brown and Size: 8, 10, 11, and 12.
Offers: In the “Offer Tab” you need to fill the information about offer like offer price, Gift Warp etc.
Images: In the “Images Tab” you need the product images with white background.
Description: In the “Description Tab” you need to file the brief products information.
Keyword: In the “Keyword Tab” you need to fill products keyword for search engine optimization.
Note: Keyword is a small set of words designed to convey the subject of a technical article. Some publications specify a fixed set of keywords from which those for a particular article should be chosen.
Examples:-Item Name: Super Sport Outdoor Men Boating Shoe
Keywords: sport shoe, super sport shoe, boating shoe, men boating shoe, outdoor men boating shoe
More Details: In the “More Details Tab” you need to basically fill more information about products like Warranty, Department, Number of pieces and lunch date etc.
When you fill the required product information then save the information by clicking the “Save and Finish “button.
Information about mandatory field of “Vital Info” Tab
The field name which is start with “*” is known as mandatory filed and it is required field without filling this field you can’t save the data.
Bulk Products Listing
Bulk Products Listing: Using this method you can adding multiple items to your merchant account can be a time-consuming process. Instead of adding products one-by-one, sellers with Pro Merchant Subscription accounts can use Amazon’s tools to upload product details in bulk.
Step For Bulk Products Listing:
Step 1:
Download Amazon’s pre-built inventory file template from Amazon.com that fits your product category (link in Resources). This template is a Microsoft Excel file.
Note: You need to download proper template file for products. It is download according to base of products category. For downloading the templates file you need to click on download. After click the download another page open which is now as seller Help center inventory file.
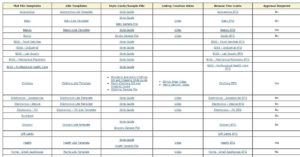
Now you can see templates file and video and other information file. Like
Flat File Templates
Lite Templates
please download attached templates file for more information.
Template 2
Step 2:
Open the template in a spreadsheet program. Each template has detailed instructions specific to your product category at the top of the document. Carefully read the instructions before entering your product details so you do not make any mistakes.
Step 3:
Add your inventory items to the template. Enter details such as SKU, product ID, title, brand, manufacturer, description and more. You can also add bullet points to expand on the description of your item in the cells labeled “BulletPoint1,” “BulletPoint2,” “BulletPoint3” and so on.
Step 4:
Save the file in the .xls format when you are finished entering product details. In Excel,
Step 5:
Save As the file as a tab-delimited .txt file, per Amazon’s instructions. This is the file format needed for uploading on Amazon.
Step 6:
Log in to your Amazon seller account. Click “Add Products via Upload,” then select the template type for the file you want to upload.
Step 7:
Click “Select File Upload,” then “Browse.” Locate your product file on your computer using the dialog box, select it, and then click “Upload Now.” After you upload the document, the page shows the status of the upload. Refresh the page to see the upload progress. Files over 5MB may take several hours to process.


